So, this week's assignment took a lot of trial and error, and in the end I wasn't able to do quite what I wanted, but I'm not unhappy with what I ended up with!
So, I started off with some sketches and I thought the patterning of the sections would work really well with text. So, the first little bit of text to come to mind that I thought would be fun to play with was "I don't have to like you" and "you don't have to like me". I wanted to play with the capabilities of pattern repeating in all directions, so I decided to try for something similar to the upper left example to fill as much space as possible with the text. I then, wrote out the words in messy block letters that I'd be able to play with and adjust in rhino.

As I traced over the text, I tried to keep the height consistent by using guides and used the control point curves to make the letters a bit more soft. I tried to keep a level of the messiness and didn't worry about making the letters too perfect as to extenuate the message of just doing your own thing. As usual when I do this process I reused letters where I could and since the two lines are quite similar it was a pretty quick process!


Next, I set up a grid so I could keep an eye on where things were starting/ending as I set up the text, I didn't end up needing a lot of guidance though, since I just used the up/down and left/right moves to keep the pieces in line with one another
As I positioned the pieces I realized there was a lot of blank space that I wanted to not have completely open so I added a checkered pattern
And this is where I started having trouble and didn't take a lot of screenshots because I was just busy problem solving. First, I was having trouble getting the checkered print to cap properly so I decided to remove it for now and see how the design looked without. Unfortunately though, the geometry gave me a bunch of errors anyways ( I suspected because it was a ton of small pieces). So I decided to simplify it by adding a base below the text so that grasshopper would only have to process one geometry instead of a bunch. This worked but there was a cracking effect at the edge of each tile and I didn't like that there wasn't any transparency through the object. I played around with some variations but wasn't really happy with any of them


And then finally, I decided to add a track behind the text so that it would be a solid piece with minimal large back sections and as many holes as possible.
But, I didn't like the way that the text looked like bars, so I decided to fill in some of the empty spaces with smiley and frowny faces, but found I had some issues with the bounding box not cutting off the edge of the objects
After manualy removing the edges I finally got something I was happy with in terms of the panelled geometry
Next though, I had to figure out a way to use this panelling. My original idea was to do something blocky where a centre piece would move up and down to make the middle either wider or thicker. Unfortunately, after modelling the form in grasshopper it wouldn't connect to the panelling, so I tested the panelling on a simpler object and it worked. And my silly brain thought that was because of layer issues, so I redid the geometry with rectangles again and sure enough it didn't connect again, so I realized it must be an issue of the geometry being a bit too complex (it was also too late in the day to go to tutoring hours so I just decided to rethink the geometry). Here's the original shapes I made though!
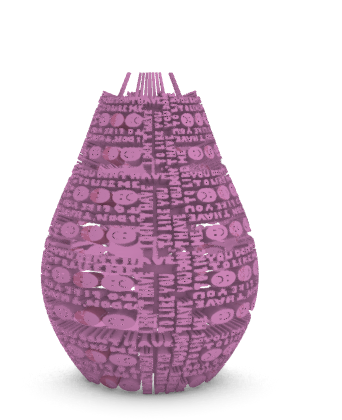
So, I decided to take my original idea of moving a middle section up and down and simplify it by using circles instead of rectangles and it worked great and I ended up really liking the movement!
And, here's the grasshopper code I used, it ended up being really simple but there was a lot more complicated stuff I couldn't use in the end haha.


.gif)

Comments
Post a Comment